Stay Tuned for Tips and Ideas coming your way, in the meantime follow us on Instagram and Facebook to keep in the Loop!
Chalk Paint
-Clean your piece thoroughly to remove any dirt and grime.
-Fill any cracks or holes and then sand them until smooth.
-Shake and stir your chalk paint well to mix the pigments.
-Apply the paint with a slightly dampened brush or roller giving it a thin, even coat.
-Let it dry for usually around 1-2 hours, repeat to desired finish.
-If you want a distressed look, simply sand back the edges and raised areas of your piece once the first coat is dry, wipe away the dust and repeat until desired look.
-Seal your masterpiece with either a wax or sealer.
-Cure time takes 2-3 weeks so be gentle with it until then.
-Lastly but most importantly, be creative and enjoy the process.
Woodubend Mouldings

WoodUbend mouldings are perfect for quickly and easily enhancing your upcycled furniture and craft projects. All you need is a heat source, some good quality wood glue and a surface to stick your WoodUbend to:
– Heat the moulding with a heat gun , hair dryer or on a griddle.
– Apply glue to the surface or the entire back of the moulding.
– Press onto surface firmly.
– Heat once more.
– Remove excess glue with a Q-tip, baby wipe or wet paint brush.
– Enjoy!
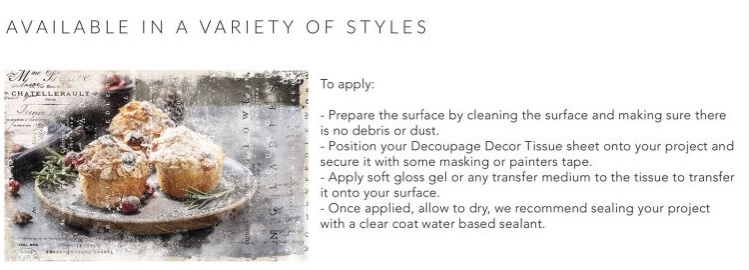
Decoupage Tissue Papers

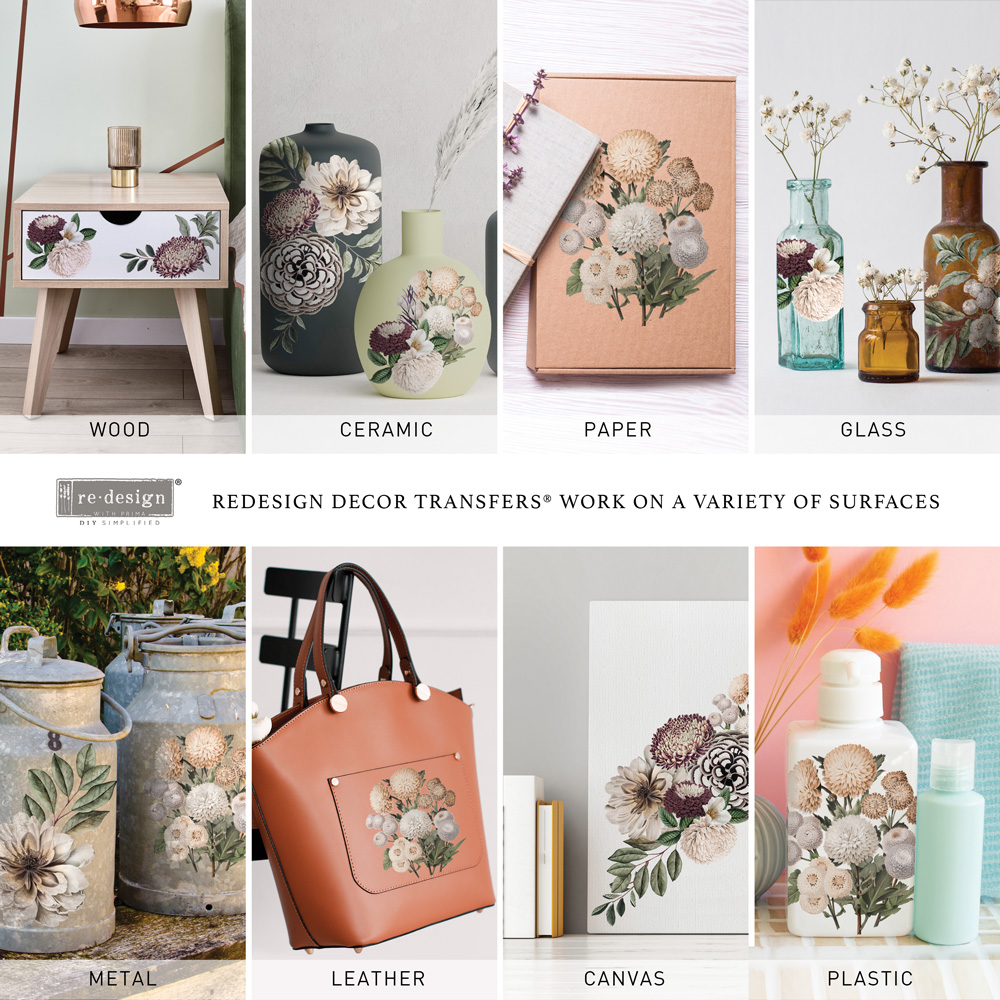
Decor Transfers

If you are after a more detailed explanation on application processes, please read below articles!
Chalk Paint
Title: Mastering the Art of Chalk Paint: A Comprehensive Guide
Introduction: Welcome to the wonderful world of Chalk Paint! If you’re looking to give your furniture and home decor a fresh, artistic touch, you’re in for a treat. Chalk Paint is a versatile and popular choice among DIY enthusiasts, known for its matte finish and ability to transform just about anything. In this blog, we’ll dive into the basics and provide you with step-by-step instructions on how to use Chalk Paint like a pro.
Understanding Chalk Paint: Chalk Paint is a unique type of paint that offers a distinctive matte, chalky finish. One of its biggest advantages is that it requires minimal preparation and adheres well to various surfaces, including wood, metal, glass, and even fabric. Its versatile nature makes it perfect for revamping furniture, accessories, and more.
Gathering the Supplies: Before you begin your Chalk Paint journey, gather the necessary supplies. These typically include Chalk Paint (in your chosen colour), brushes, sandpaper, a clean cloth, and wax or a sealer for protection.
Surface Preparation: While Chalk Paint eliminates the need for extensive sanding or priming, it’s essential to ensure that your surface is clean and free from dirt, grease, and loose debris. Lightly sand any rough patches for a smooth finish.
Applying Chalk Paint: Stir your Chalk Paint thoroughly to achieve a consistent texture. Dip your brush into the paint and remove any excess by tapping it on the rim of the container. Apply thin and even coats of paint, allowing each coat to dry before applying the next. Remember, Chalk Paint dries relatively quickly, so work in small sections for better control.
Creating Distressed Effects: If you desire a distressed or aged look, Chalk Paint offers endless possibilities. Once the base coats are dry, use sandpaper to gently distress the edges and corners, revealing the underlying layers of paint. Experiment with different techniques until you achieve the desired effect.
Adding Wax or Sealant: To protect your newly painted surface and enhance the longevity of your project, apply a coat of wax or sealer. Waxing creates a soft sheen and a smooth feel, while a sealer provides a more durable finish. Follow the instructions on your chosen product to achieve the best results.
Exploring Colour Techniques: Chalk Paint opens up a world of colour possibilities. Don’t be afraid to mix different shades or apply multiple colours to create unique effects. You can experiment with ombre, colour-blocking, or even stenciling to add depth and character to your projects.
Maintenance and Care: Proper maintenance is key to preserving your Chalk Paint projects. Avoid using harsh chemicals or abrasive cleaners, as they can damage the finish. Instead, gently clean the surface with a damp cloth and mild soap, if necessary.
Conclusion: Congratulations! You are now equipped with the knowledge to unleash your creativity using Chalk Paint. From reviving old furniture to breathing new life into home decor, this versatile paint offers endless possibilities. Remember to embrace experimentation, have fun, and let your imagination run wild. Get ready to transform your space with the magical allure of Chalk Paint!
Title: Choosing the Perfect Paintbrush for Chalk Painting Furniture: A Comprehensive Guide
Introduction: When it comes to chalk painting furniture, selecting the right paintbrush is essential for achieving a smooth and professional finish. With the right brush, you’ll have better control over your strokes, minimise streaking, and achieve the desired texture. In this blog, we’ll provide you with a comprehensive guide to help you choose the perfect paintbrush for your chalk painting projects.
- Consider the Bristle Material: Paintbrushes for chalk painting are available in different bristle materials, each offering unique characteristics. Two common options are natural bristle brushes and synthetic bristle brushes.
Natural Bristle Brushes: These brushes are typically made from animal hair, such as hog or boar bristles. They are excellent for chalk paint because they hold a lot of paint, allowing for efficient coverage and smooth application. Natural bristle brushes are ideal for larger surfaces and rough textures, providing a textured finish.
Synthetic Bristle Brushes: Made from synthetic materials like nylon or polyester, these brushes are well-suited for chalk paint as well. They offer a smoother finish and work particularly well on smoother surfaces. Synthetic bristle brushes are also great for detailed work and achieving a more precise application.
- Consider the Brush Shape and Size: The shape and size of the brush play a crucial role in achieving the desired effect and ensuring easy maneuverability. Here are a few common brush shapes and their applications:
Flat Brushes: Flat brushes have straight edges, making them suitable for large, flat surfaces. They are great for covering larger areas quickly and efficiently.
Round Brushes: Round brushes have a tapered shape and are ideal for detailed work, corners, and edges. They provide more control and precision during application.
Angled Brushes: Angled brushes feature slanted bristles, allowing for easy access to corners and tight spots. They are versatile and useful for both larger surfaces and intricate details.
Consider the size of the brush as well, keeping in mind the scale of your furniture and the level of detail you want to achieve. Larger brushes cover more area quickly, while smaller brushes offer more control and precision.
Quality and Durability: Investing in a high-quality paintbrush is essential for achieving excellent results and ensuring durability. Look for brushes specifically designed for chalk painting, as they are crafted to withstand the unique properties of chalk paint. Quality brushes will have well-secured bristles, sturdy handles, and durable ferrules (the metal or plastic band that holds the bristles in place).
Experiment and Personal Preference: While there are general guidelines for selecting paintbrushes, personal preference and experimentation play a significant role. Every artist and project is unique, so don’t be afraid to try different brushes and techniques to find what works best for you. Consider factors such as the weight and feel of the brush in your hand, as well as how it glides over the surface.
Conclusion: Choosing the right paintbrush for chalk painting furniture is crucial for achieving professional and satisfying results. By considering factors such as bristle material, brush shape and size, quality, and personal preference, you’ll be equipped to make an informed choice. Remember to invest in high-quality brushes, experiment with different options, and enjoy the process of transforming your furniture with the perfect paintbrush. With the right tool in hand, your chalk painting projects will shine with beauty and craftsmanship.

Title: Elevate Your Furniture with Stencils and Chalk Paint: A Step-by-Step Guide
Introduction: If you’re looking to breathe new life into your furniture with a touch of creativity, combining stencils with Chalk Paint is an excellent choice. Stenciling allows you to add beautiful patterns and designs to your furniture, while Chalk Paint offers a vintage and matte finish. In this blog, we’ll guide you through the process of using stencils on furniture with Chalk Paint, helping you transform your pieces into unique works of art.
Choose the Right Stencil: Select a stencil that complements the style and size of your furniture. Consider the theme or design you want to achieve and choose a stencil with patterns or motifs that resonate with your vision. Ensure that the stencil is suitable for use with Chalk Paint.
Prepare Your Furniture: Before you begin stenciling, prepare your furniture by cleaning it thoroughly. Remove any dirt, grease, or previous finishes. Sand the surface lightly to create a smooth base for the Chalk Paint and ensure proper adhesion.
Apply the Base Coat: Start by applying a base coat of Chalk Paint to your furniture. Choose a colour that complements the design and aesthetic you have in mind. Allow the base coat to dry completely before moving on to the stenciling step.
Position and Secure the Stencil: Place the stencil on the desired area of your furniture. Ensure it is aligned and centred according to your preference. Use painter’s tape or adhesive spray to secure the stencil in place, making sure it lies flat against the surface and doesn’t shift during the painting process.
Load Your Brush: Load a stencil brush or a small foam roller with Chalk Paint. Dip the brush lightly into the paint, and then dab it onto a clean cloth or paper towel to remove any excess. The brush should be slightly damp, but not overloaded with paint, to prevent bleeding or smudging.
Stencil with Care: Using a dabbing or swirling motion, apply the Chalk Paint over the stencil openings. Start from the outer edges of the stencil and work your way toward the centre, maintaining a gentle and even pressure. Avoid brushing or dragging the paint to minimise the risk of smudging or bleeding.
Multiple Layers or Colours: If you’re using multiple colours or layers, allow the first layer to dry completely before proceeding. Once the first layer is dry, reposition the stencil if necessary and repeat the stenciling process with a different colour or design. This layering technique adds depth and dimension to your furniture.
Remove the Stencil and Touch-Up: After completing the stenciling, carefully lift the stencil from one corner, ensuring not to smudge the design. If needed, touch up any imperfections or clean edges using a small brush or a cotton swab dipped in Chalk Paint. Allow the stenciled design to dry thoroughly.
Protect and Finish: To protect your stenciled design and the entire piece of furniture, apply a topcoat or wax over the Chalk Paint. This will provide a protective layer and enhance the durability of your finished project. Follow the manufacturer’s instructions for the specific Chalk Paint brand you are using.
Conclusion: Stenciling with Chalk Paint is a fantastic way to add artistic flair and character to your furniture. By following these step-by-step instructions, you’ll be able to transform your pieces into one-of-a-kind creations. Remember to choose the right stencil, prepare your furniture properly, stencil with care, and protect your finished work. Unleash your creativity, and enjoy the process of turning your furniture into stunning focal points that reflect your personal style.

Introduction: Decoupage, the art of decorating surfaces with cut-out paper designs, offers a delightful way to breathe new life into your furniture. By using decoupage paper, you can create unique and personalised pieces that showcase your creativity. In this blog, we’ll guide you through the process of using decoupage paper on furniture, helping you achieve stunning results.
Gather Your Supplies: Before you begin, gather the necessary supplies. These typically include decoupage paper, scissors, a soft brush, decoupage glue or medium, a clean cloth, sandpaper, and a protective sealant (optional).
Choose the Right Decoupage Paper: Select decoupage paper that suits your desired style and complements your furniture. Decoupage paper comes in various designs, patterns, and colours, allowing you to create a look that is uniquely yours. Consider the scale and dimensions of your furniture when choosing the size of the paper.
Prepare Your Furniture: Prepare your furniture by cleaning it thoroughly. Remove any dust, dirt, or existing finishes. If the surface has a glossy finish, lightly sand it to create a better grip for the decoupage glue and paper. Wipe away any sanding residue with a clean cloth.
Cut and Arrange the Decoupage Paper: Cut out the desired shapes or designs from your chosen decoupage paper. Experiment with different arrangements on the furniture surface until you’re satisfied with the layout. This step allows you to visualise the final result and make any adjustments before gluing.
Apply Decoupage Glue: Using a soft brush, apply a thin, even layer of decoupage glue or medium to the furniture surface where you’ll be placing the decoupage paper. Start with a small section to avoid the glue drying too quickly. The glue acts as both an adhesive and a sealant.
Place the Decoupage Paper: Carefully place the cut-out decoupage paper onto the glued surface, smoothing it out gently with your fingertips or a clean cloth. Be mindful of any wrinkles or bubbles and try to eliminate them as much as possible. Continue this process for each piece of paper.
Seal and Protect: Once the decoupage paper is in place, apply another layer of decoupage glue or medium over the entire surface, including the paper. This layer will seal the paper, protect it from wear and tear, and provide a cohesive finish. Allow the glue to dry completely.
Finishing Touches: If desired, you can further enhance the appearance of your decoupage project. Consider distressing the edges of the paper with sandpaper for a vintage look, or adding additional decorative elements, such as stamps, stencils, or paint accents. Let your creativity guide you!
Optional: Apply a Protective Sealant: To ensure the longevity of your decoupage furniture, consider applying a protective sealant over the entire piece. This step adds an extra layer of durability and guards against moisture, scratches, and fading. Follow the manufacturer’s instructions for the specific sealant you choose.
Conclusion: Decoupage paper provides a fantastic opportunity to transform your furniture into stunning and personalised works of art. By following this step-by-step guide, you’ll be able to create eye-catching pieces that reflect your unique style and creativity. Remember to choose the right decoupage paper, prepare your furniture properly, apply the glue with care, and protect your finished work. Enjoy the process of decoupaging and see your furniture come to life with beautiful designs and patterns.
Title: Elevate Your Furniture with Stunning Transfer Applications
Introduction:
Are you seeking a simple yet impactful way to elevate the look of your furniture? Look no further than furniture transfer applications. With their versatility and ease of use, transfers allow you to add character, style, and a touch of artistic flair to your beloved pieces. In this short blog, we’ll explore the basics of furniture transfer applications and inspire you to embark on a creative journey that will transform your furniture into captivating works of art.
1. What are Furniture Transfers?
Furniture transfers are decorative elements that can be applied to various surfaces, such as wood, metal, or even fabric. They come in the form of pre-printed designs, patterns, or images on transfer paper. These transfers can mimic the look of hand-painted artwork, vintage signage, delicate typography, or intricate motifs. They provide a simple and effective way to achieve eye-catching and personalised aesthetics.
2. Choosing the Right Transfer:
When selecting a transfer, consider the style and theme you wish to achieve. Do you prefer a rustic farmhouse charm, a bohemian flair, or a modern and minimalistic touch? Pay attention to size, colour, and overall design to ensure it complements your furniture piece and the surrounding decor.
3. Preparing the Surface:
Before applying the transfer, proper surface preparation is essential. Clean the furniture thoroughly, removing any dirt, dust, or grease. If needed, sand the surface to create a smooth and even texture. For certain materials like glossy finishes or laminate, it might be beneficial to apply a coat of primer to enhance adhesion.
4. Application Process:
a. Cut: Trim the transfer design to the desired shape and size, considering the dimensions and contours of your furniture piece.
b. Peel: Remove the backing paper from the transfer, exposing the adhesive side.
c. Place: Carefully position the transfer onto the desired location on the furniture surface.
d. Press: Firmly press down on the transfer using a squeegee or a credit card, ensuring it adheres uniformly without any air bubbles or wrinkles.
e. Peel Back: Gently peel back the protective film, revealing the transferred design on the furniture.
f. Smooth and Seal: Using a soft cloth or a brush, gently smooth out any remaining air bubbles or creases. Finally, seal the transfer with an appropriate protective coating, such as a furniture wax or sealant, to enhance durability and longevity.
5. Enhancing the Design:
To truly make your furniture transfer application stand out, consider additional techniques to enhance the overall design. You can distress the edges, apply glazes or washes for an aged effect, or even combine multiple transfers to create a layered and dimensional look. Experiment with different finishing techniques to achieve a truly personalised and stunning result.
Conclusion:
Furniture transfer applications offer a simple yet transformative way to breathe new life into your furniture pieces. With their wide range of designs and styles, you can unleash your creativity and customise your furniture to match your unique taste and home decor. Whether you’re looking to add vintage charm, artistic elegance, or contemporary flair, furniture transfers will be your trusted companion on this creative journey.
So, gather your favourite transfers, prepare your furniture canvas, and let your imagination soar as you embark on a furniture transformation adventure. Get ready to enjoy the satisfaction of witnessing your once ordinary furniture pieces become extraordinary focal points in your home!
Remember to follow the instructions provided by the transfer manufacturer and prioritise safety precautions during the application process.
Happy transferring!
Subscribe to Our Newsletter
Everything you need to get started on your painting journey.
Visit us!
© The Little Paint Pot | All Rights Reserved